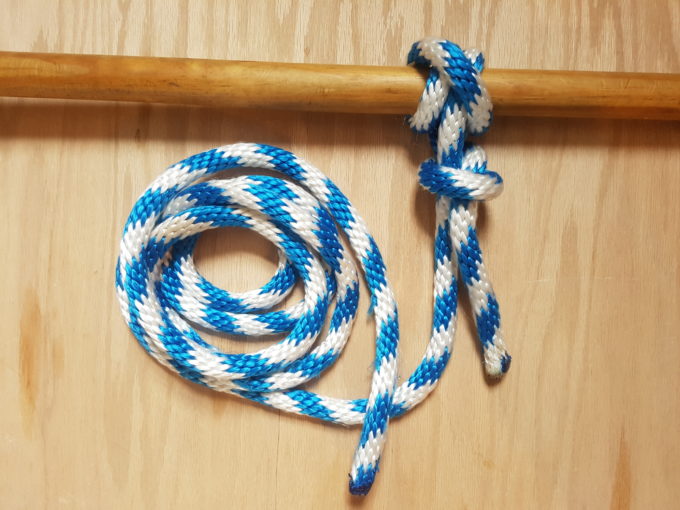
This unit uses our most common resource, ‘The Fundamentals of Fire Fighting Skills’ (FFS), as well as other more generic sources such as the knot section of a Boy Scout book or Youtube. The ‘Barron’s: Firefighter Exams’ book didn’t really have a any specific sections or tests related to ropes and knots, however, we took advantage of this and continued with the many extra pages that related to the Tools and Equipment Unit we had just completed. These books and other helpful resources are discussed in more detail on the Orientation Page, while the Fire Fighting Skills Homepage also outlines (with links as we go along) each of the units we will cover if you want more information.
Here is a list of the skills and learning goals for this unit, along with the page numbers for each. Ropes and Knots:
- Learn the difference between and particular function of: (FFS pages 260-2)
- Life Safety Rope
- Escape Rope
- Utility Rope
- Learn some basics about ropes: (FFS pages 261-5)
- Construction:
- Twisted
- Braided
- Kernmantle
- Natural Fiber Vs Synthetic
- Dynamic Vs Static
- Construction:
- Learn about Rope Maintenance (FFS pages 268-70)
- Learn the form and function of several commonly used knots: (FFS pages 271-286)
- Safety Knot
- Half Hitch
- Clove Hitch in Open
- Clove Hitch Around an Object
- Figure Eight
- Figure Eight on Bight
- Figure Eight Follow-Through
- Figure Eight on Bend
- Bowline
- Sheet/Becket Bend
- Water Knot
- Learn how specific knots are used on the job. (FFS pages 287-293)
- Learn how webbing or rope can be used to enter a window.
- Learn how webbing and rope can be used for self rescue and to rescue victims. (See Hands-On Ideas below with links.)
Hands-On, Project, and Field Trip Ideas:
-
- Visit a hardware store to check out each type of rope.
- Visit a Fire Station to check out the ropes on each apparatus.
- Ask the Fire Fighters to show you what what kind of webbing or rope they carry personally for use and emergency.
- You can also YouTube ‘Firefighter Personal Escape System.’
- Purchase a 10 foot piece of large diameter rope to practice ties. (FFS Skills Drills 10-5 through 10-15)
- Ropes & Knot Skills on YouTube
- Get ahold of some real fireman webbing or purchase some nylon strap (cut-by-the-foot at a hardware store) to practice webbing ties and rescue maneuvers.
- Three Great YouTube Videos for this:
- Tying and Storing Webbing
- Webbing Drags and Carries (and hasty harness)
- Single Firefighter Hasty Harness
- Practice Rescues and Blind Rescues: Open eyed or blindfolded use a few basic tools, like door wedges and a fake Halligan tool or stick, to find a victim (your plastic skeleton if you have one) who is trapped in your house, and use your webbing to extricate them.
- Three Great YouTube Videos for this:
- Learn how to tie paracord bracelets.
- Here is a YouTube link to a very basic style.
- Here is a YouTube link to a quick release style with enough length for an actual emergency exit.
- Practice raising and lowering tools with Utility rope. (FFS Skill Drills 10-16 through 10-21)
- Practice using rope or webbing to enter window. (Video Starting @7:48)
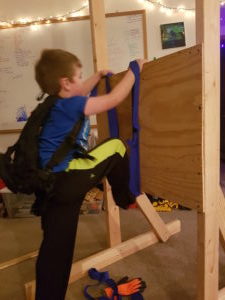
- Build your own fake window for entering. (See Photo below)
So how did it go for us?!

Replica window to practice entering with webbing.
The reading for this unit is very straight forward. It may not seem uninteresting but it’s useful for daily life and flows along pretty quickly. Nathan wasn’t too into learning some boring knot ties, but he did like playing around with the large diameter rope we purchased.
One day I took the rope and his webbing with us to the playground and we started creating swings, and loops, and even a design for a very simple hammock which really got his attention as to why knots are a useful thing. I like the versatility of the large rope. It isn’t particularly long (1o feet) but it can be used for jump roping and other kinds of play. I’m glad we’ll have it around for creative use. I also look forward to bringing various ropes along when we travel and camp for some good woodsman exploration.
We also learned how to make simple paracord bracelets. We don’t have one of the cool little ‘Ezzzy-Jig’ set-ups with buckles and inches marked, so it’s a little too difficult for Nathan to start one himself, but once we get it going (and taped to a table or something) he is able to help fold and tie each line. We added firefighter charms to ours (how-to here) and made matching ones for a family gift.
In the end, I feel like the skills from this unit are ones we will continue to learn, use, and practice through-out life, so I really didn’t press Nathan too much about mastering each drill. (Or even trying each one! Shoot!) But even knowing just 2 helpful knots goes a long way. As for the webbing ties, that is very different. When we first learned those, very early in the year, he had a lot of fun with them. Those too, however, are much the same. The simplest webbing ties are his favorite, so I don’t drill him on the more complicated ones. The whole purpose of this training was to introduce him to some of the more detailed aspects of Firefighting, and not to ruin his dreams with over-the-top expectations. So far so good! He still wants to be a fireman!
For our next unit, we’ll be moving on to Ladders!


Post a comment