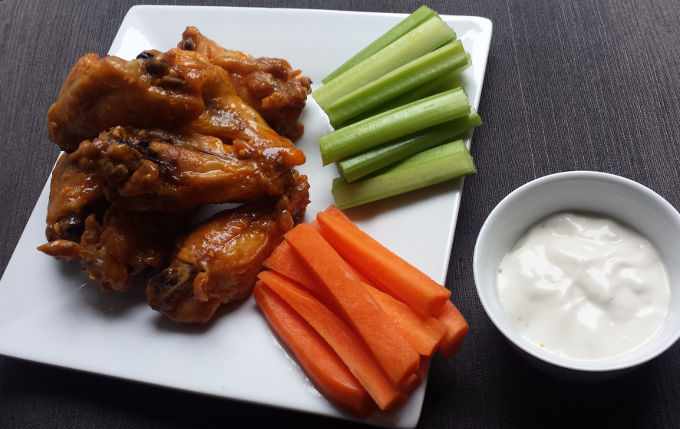
Yeah, these chicken wings didn’t last long. Good thing the children don’t like spicy food, or I would never get anything to eat.
Welcome to the chicken wings page! This is the first step of my plan of world domination. I have no idea what that means, but it sounds fiendish. As you might be familiar, I tend to prattle just a little bit during my blog entries. But not this time. No, this time I will try (the keyword being “try”) as earnestly as possible to keep this post only as long as it needs to be. The beginning of this post will briefly go over a couple different ways of cooking chicken wings, as well as how to cut them into proper sections if they aren’t already separated.
The goal of this newfangled idea is to add a section to the right sidebar of this website featuring party favorites. Something that can and should be added to by us, as well as all of you out there. In addition to chicken wings, pizza and burgers will probably get their own space as well.
I won’t get too in depth about cooking methods or the correct way to separate your wings however, because quite honestly what works for me, might not work for you. On the other hand, if you’re standing in the kitchen, scratching your head and looking at a frozen bag of chicken wings wondering how in the world you should go about cooking them, then I would recommend using Alton Brown’s method which I will discuss below. Just make sure you put that frozen bag of chicken back in the freezer and go get some fresh chicken wings to use.
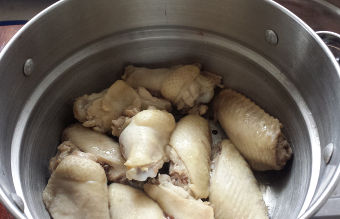 In essence, he begins by steaming the chicken for roughly 10 minutes. Not boiling them, but steaming them in a large pot. If you don’t have a large pot you can steam them in smaller batches like what you see to the left. What this does, is partially cook the chicken while helping it remain moist. You could of course deep fry the chicken wings like a lot of restaurants do, but since the skin has enough fat in it, it will essentially fry itself. If you plan on deep frying them, I would recommend cooking them at 350° F (175° C) for just a few minutes. Once the chicken is done being steamed, it needs to be put on a cooling rack to dry out for about an hour. Yeah I totally don’t do that at all, because I don’t feel it’s necessary but you can if you want.
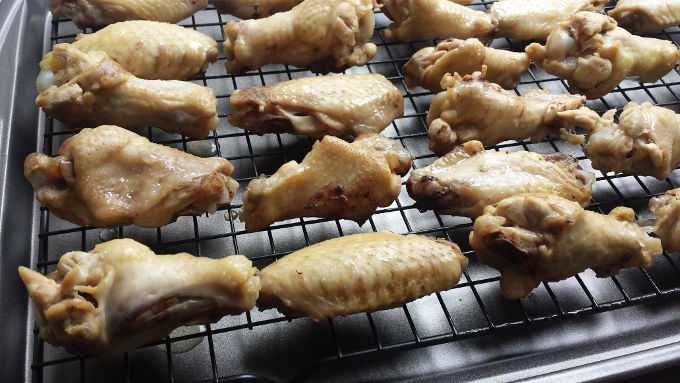
Make sure you are using a rack (don’t forget the non-stick cooking spray) on a sheet pan for the best results. Then go ahead and pop the wings into a 425° F (215° C) oven for 20 minutes. After the 20 minutes are up, the wings should be removed from the oven and turned over before going back into the oven for another 20 minutes. I know that might seem like a little overkill, but it really gets the skin nice and crispy. So that’s it in a nutshell, but here’s the link to the Food Network website with directions directly from the source: Buffalo Wings
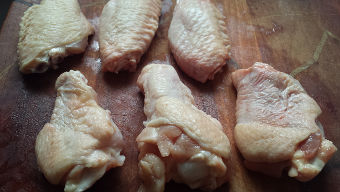 Feel free to skip the next two paragraphs if you know how to cut up a chicken wing. When it comes to separating your chicken wing into the two recognizable wing sections we are all familiar with, there will be two cuts that need to be made. If you look at the chicken wing, you might notice a part that resembles a full size drumstick, but is smaller. That is called the drumette. The other part is known as the flat of the wing. Then there is a third little section known as the tip, but don’t worry about that because it’s just going to be removed and either discarded or used to make some chicken stock.
You might need to try a few different spots when cutting off the tip, but once you find the joint, you will know it because it becomes substantially easier to cut through. The same thing goes when separating the drumette and the flat. To make it easier, you can simply hold the wing in your hand with the joint facing up, and then squeeze your fist a little to apply some pressure on the joint. Take your knife and carefully make a small cut, noting where the actual joint is and where it begins to separate. Then you can set the wing down and finish the cut. But again, be careful and please don’t cut yourself. You can refer to the picture below for more information.
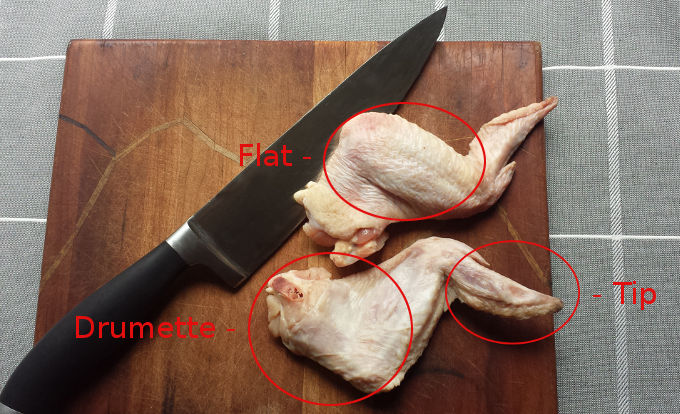
Check out my professional, high-quality chicken wing visual guide. Perfect for those who don’t recognize poor GIMP photo editing skills.
Here are a few final thoughts before I share a basic recipe for what is probably the most popular style of chicken wing; the Buffalo wing. When it comes to choosing what hot sauce you are going to use, just remember that simple is good. You don’t need to use something as basic as Tabasco sauce, but you definitely don’t need something with twenty ingredients. Anything with vinegar, cayenne red pepper, salt, and garlic should do the trick.
Apart from using the method mentioned above, you could also choose to bread the wings if you’re going to deep fry them. The most basic choice is simply dredging them in flour before deep frying them, but you could also experiment with some Panko or a mix of the two. I don’t know how the breading might respond to different sauces though. In the end, figure out what works best for you and then simply choose a sauce or style of coating you like the best, and drown those wings in it.

Buffalo Wings
By: Not us, I think it was Teressa Bellissimo
Serves: Varies
Ingredients:
- 6 fresh chicken wings (split into drumettes and flats making a total of 12 pieces)
- 1 clove garlic (minced)
- 2 tablespoons unsalted butter
- 1/4 cup hot sauce
Directions:
- Cook chicken wings as desired, making sure to have the sauce below ready to go as soon as the chicken is done.
- Add butter to small saucepan and melt over low heat. You could also use a microwave if you want.
- Add the minced garlic to the melting butter.
- Once melted, stir in the hot sauce until everything is thoroughly blended.
- In a large bowl combine sauce and wings and toss them until chicken wings are evenly coated.
- Serve with sliced carrots and celery, along with a side of blue cheese.
- Enjoy!

Post a comment