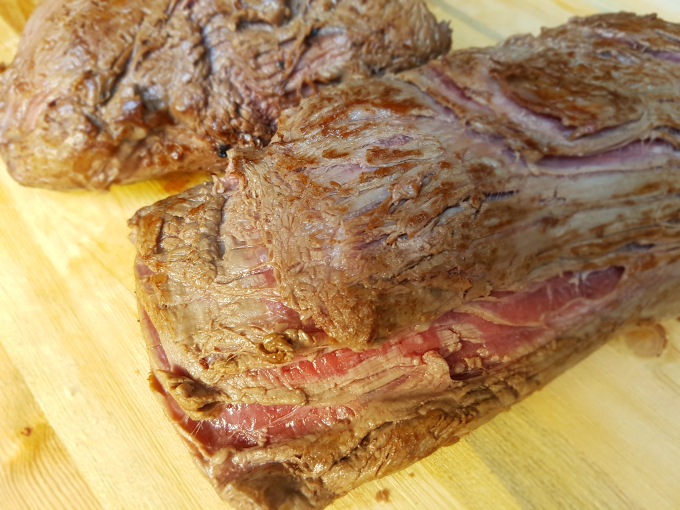
Beef Wellington is something I wasn’t too familiar with until the last month or so. Let me tell you what I mean. This is going to sound way of topic, but just bear with me for a minute. Vanessa was invited to participate in one of those “Murder Mystery” dinners. I think it was supposed to be set in England during the 1920’s.
Well, some of the people participating were going to be bringing food for appetizers, entrées, side dishes, and desserts. You get the picture. So to keep with the time frame of the murder mystery, beef Wellington seemed like a good choice for an entrée. And Vanessa and I like cooking so we were happy to take on the responsibility of making some for everyone.
Basically, Vanessa was asked a month in advance if we would be willing to bring the beef Wellington. So that meant I/we had plenty of time to do a little research and figure out the best way to go about making it.
Plus, it would be a great opportunity for us to learn something new. And here’s the first thing I learned. Don’t use a low quality cut of meat for this dish. It won’t be the same. I know it’s not cheap, but beef tenderloin is part of what makes beef Wellington what it is. The amount of tenderness you get out of the tenderloin is definitely worth the extra money you’re going to be paying.
The second thing I learned, is that we really, really like duxelles. And if you’ve never had it before, you don’t know what you’re missing. If you don’t like mushrooms, I truly feel bad for you.
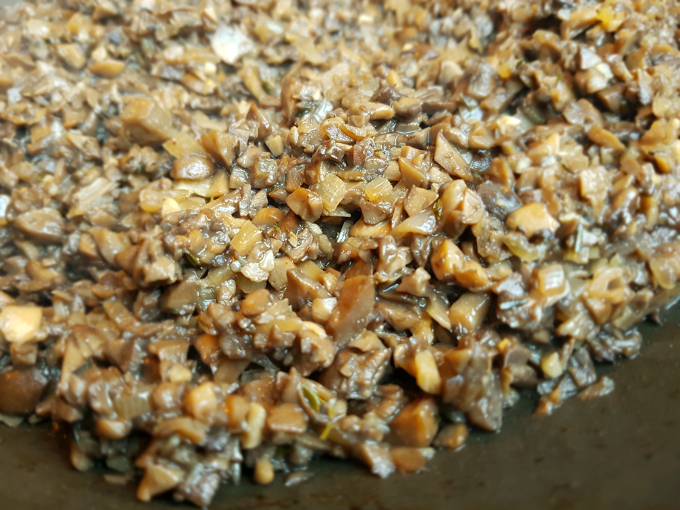
I’m sorry, but I’m going to have to take a minute and talk a little bit more about this wonderful mushroom concoction. There are lots of ideas and discussions around the internet on just what exactly a proper or classic duxelles (pronounced dooks-elle) consists of.
There are also many different types of mushrooms that people use and recommend. I don’t really have much of an opinion on this, except to say that I think it’s best to use cheaper mushrooms since they are just getting chopped up and essentially reduced over low to medium heat.
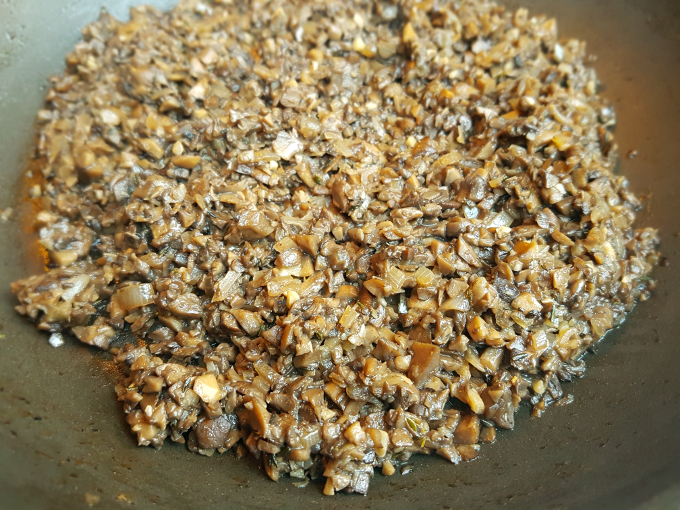
In addition, you might notice that my duxelles above hasn’t been chopped or blended to oblivion. I didn’t use a food processor like some recipes call for. It’s really up to you though how you want to make it. The goal is simply cooking away all the moisture that the mushrooms release, without burning anything.
I personally decided on a recipe that consists of sautéed garlic and shallots, crimini mushrooms, thyme, and white wine.
When it comes to the prosciutto, you are going to have to decide for yourself just how much you want to use for the 2 pounds (just under 1 kg) of beef. It’s kind of salty so adjust accordingly. At our local grocery store, they sell them in 3 oz (85 grams) packages with 7 slices in each.
If you go for less, it will save you some money because we all know prosciutto isn’t cheep. At least here in Alaska it isn’t. But the slices are thin and won’t add as much flavor as doubling the amount will.
However, doubling the amount might be a little overpowering for some people. If you don’t know which way to lean, I recommend being conservative and stick with using less.
That brings me to the third thing I learned. Beef Wellington as a whole, is not a cheap dish to make. The average price for beef tenderloin here in Alaska is roughly $20 dollars per pound. It will vary depending on where you go, but that’s a pretty accurate estimate.
There is one exception to this average price however; and that is Costco. I called them after pricing some at a different store, and they said they had it but it’s against their policy to give the price over the phone. I found that to be quite funny.
Anyway, I’ll leave it at that and won’t say anything else about it. But at the end of the day, it was an easy decision to buy the tenderloin from Costco.
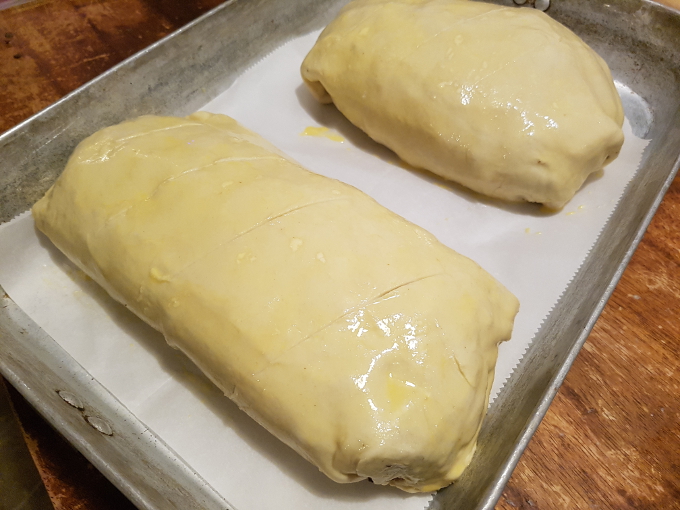
I’ve covered the beef Wellington with an egg wash and then lightly scored it across the top with a knife. It should be ready to go in the oven at this point.
When it comes time to roll out the puff pastry, make sure you don’t forget to put it on a sheet of plastic wrap when you’re finished. If you start stacking the ingredients on the pastry before setting it on the plastic wrap, you’ll be rolling it up by hand. So just don’t forget it. I learned the hard way. If you do happen to forget, don’t worry because it will still work, but you might find yourself trying to finagle things into place.
“Let’s talk about the egg wash for a minute. But first, if you aren’t familiar with what an egg wash is, check out the following from wikiHow. I’m not sure how I feel about wikiHow, but here’s some good information from them.
Decide if you are going to use water, milk, or heavy cream in your egg wash.
“If you are not interested in achieving a particular look, you can use any of the three you have on hand. Keep in mind it is the yolk of the egg that determines the shade and the gloss. The other liquids (including the egg white) are used to thin the yolk so it won’t dry out your pastry and cause it to crack in the oven, and also to help you control the shine and shade of brown of your finished pastry.”
- Water will make a less shiny (more of a matte), golden brown glaze. Adding water will make your wash extra flexible, and is good for things like bread that will expand a lot as they bake.
- Milk will add more shine, but otherwise will have a very similar affect as water.
- Cream will give your pastry a shiny, rich brown finish. It doesn’t add as much give, so try to use it only on things that won’t expand very much as they bake, like pie crust.”
Whisk in milk, water, or heavy cream. Start with 1 teaspoon per egg used.
“If you are glazing something that is going to expand quite a bit (like a pastry or loaf of bread that is going to rise significantly), mix in another 1-2 teaspoons of liquid. This will give your glaze a little more give and prevent cracking as the pastry expands.”
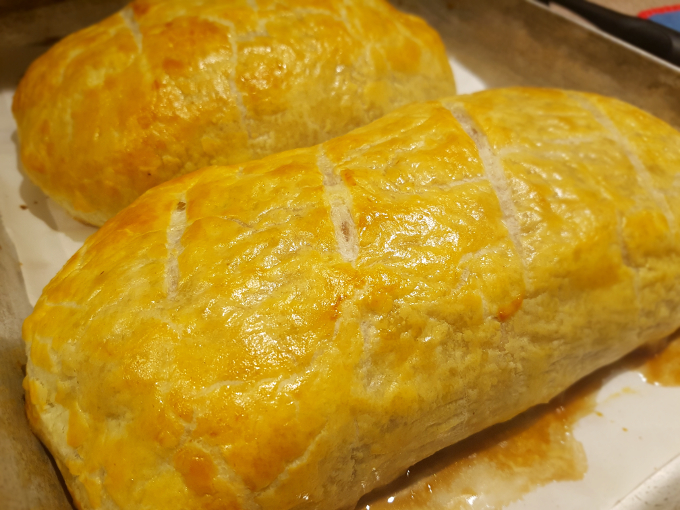
Before putting any of the ingredients on the puff pastry, you will want to take your egg wash and brush some of it around the edges of the puff pastry. About one inch wide will work just fine. This will essentially help “glue” the edges of the puff pastry together after wrapping it up.
The same egg wash will then be used to coat the outside of the puff pastry after it’s been rolled up. It’s what gives it that nice golden color. Keep in mind, we’re not trying to roll up the beef Wellington like a pumpkin spice roll where it rolls over itself and makes something like a spiral shape.
We just need each side of the puff pastry to reach a little past the halfway mark on the top of the beef tenderloin. If the pastry overlaps too much and becomes too thick, it won’t bake properly.
You’ll find this to be especially true when you are folding the ends in. You’re probably going to end up cutting away a bit of puff pastry, but that’s just how it is. As long as you try to keep things from overlapping too much, you should be good.
And that’s basically it. The only thing left is to bake it. I hope you like the recipe and enjoy this dish as much as I do. Please let us know what you think, we want as much feedback as we can get. So until next time, cheerio!
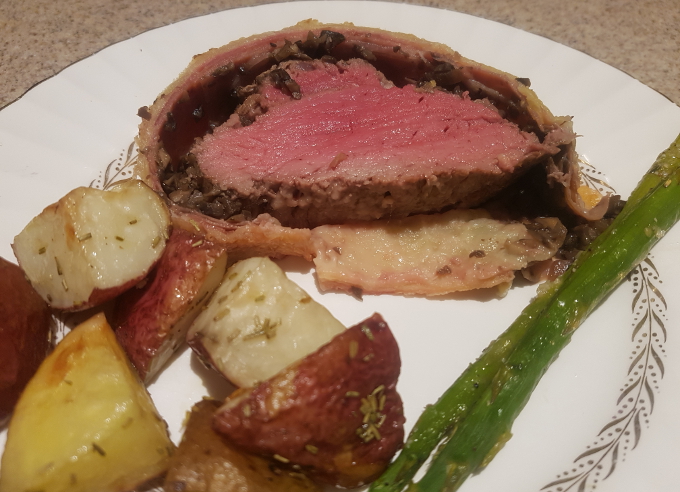
Beef Wellington With Prosciutto And Duxelles
By: Semiserious Chefs
Serves: 4-6
Ingredients:
- 2 pounds beef tenderloin (fat trimmed)
- 1 puff pastry sheet (rolled out large enough to cover tenderloin)
- 3 oz. prosciutto (about seven slices, but feel free to double this if you wish)
- 1 egg
- 1/2 tablespoon half & half (water, milk, or heavy cream are fine too)
- Duxelles (recipe below)
Duxelles
- 3 cups chopped mushrooms (I like crimini myself)
- 2 cloves garlic (minced)
- 1 shallot (diced)
- 1/4 cup white wine
- 1/2 teaspoon thyme
- 2 tablespoons butter
- Salt and pepper to taste
Directions:
- If your puff pastry is in a freezer, it needs to be pulled out and given enough time to thaw, so it can be rolled out a little with a rolling pin.
- Begin by trimming the excess fat from the beef tenderloin. (If you don’t know how, click here)
- In a large pan, sear all sides of the tenderloin over medium-high heat to lock in the juices.
- Remove tenderloin from heat and let rest.
- In a different pan, melt butter and sautée the garlic and shallots over medium-high heat for two minutes stirring often.
- Add the mushrooms, thyme, salt and pepper and then reduce the heat to medium-low. This new mixture will appear to be very dry at first, but don’t worry the mushrooms will begin releasing water.
- This water is what we will be cooking away. If you find this process to be too time consuming, try turning the heat up to medium, but make sure nothing begins to burn. Continue to stir regularly and after 10-15 minutes, most of the water should be gone.
- Add the white wine and continue reducing until the duxelles has become a little bit like a paste. Remove from heat.
- Preheat oven to 400° F (200° C)
- Roll out the puff pastry so it’s large enough to wrap around the beef tenderloin.
- Place the pastry on a large sheet of plastic wrap.
- In a small dish, whip egg until blended and mix in the half & half to make the egg wash.
- Brush the egg wash all around the edges of the puff pastry. It only needs to be about an inch wide.
- Lay down the prosciutto slices side by side across the middle of the puff pastry. If you are doubling the amount, you will need to adjust accordingly.
- Evenly spread the duxelles across the top of the prosciutto slices making a large square inside the egg washed edges of the pastry.
- Now, set your beef tenderloin in the middle.
- Take the edge of the plastic wrap closest to you and gently lift it up, bringing the edge of the puff pastry over the top of the beef. Repeat with the other side. If all goes well, there should be a little bit of an overlap on top of the tenderloin.
- Seal the top and ends by lightly pushing down at the seams. The egg wash will help keep them together. The ends might be a little tricky, but don’t overthink it. Just do your best.
- Flip the whole thing over so the seam is now on the bottom and place in an appropriate baking dish.
- Brush egg wash over the entire surface of the beef Wellington, and lightly score across the top with a butter knife.
- Place the beef Wellington on the middle wrack of the oven and bake at 400° F (200° C) for 30 minutes.
- Remove from oven and let cool for 5 minutes.
- Slice into 1 inch sections, serve and enjoy.


Post a comment