


Ahh now we’re getting to one of my favorite things. Creating and putting together your very own pizza. It’s quite honestly one of my favorite things to do. Whether it be the simplest and most well known pizza such as a pepperoni pizza, or some other creation entirely your own, the most important part of the whole process begins with the dough. You can’t have a good pizza without good dough.
It’s that important I feel. Properly made pizza dough is the building block for an amazing pizza. If you don’t have that, you might as well not make any pizza at all. It has to have just the right amount of chewiness, otherwise known as elasticity, that you would find at a real pizzaria. For many people, that can be a hard thing to accomplish.
Avoid any of those premade store bought pizza shells. You know which ones I’m talking about. They’re super expensive, and they don’t really taste that great.
So do yourself a favor and save yourself a small fortune by simply making your own pizza dough at home. It’s way cheaper and tastes way better. With just a little planning, you can have your pizza dough ready and waiting for dinner time.
Before I go any further though, let me just say that although the following recipe is great and has worked quite well for us over the years, I am not fully satisfied and will be trying some different flours as well different rise times until I am more satisfied with the results.
You can let this pizza dough do a single rise, or let it do a double rise. That’s really up to you, but keep in mind that the dough will need to rest sufficiently before you begin working with it. If the dough is quick to snap back to its original shape when stretched, the dough needs to rest longer.
On the other hand, if you are having trouble with the dough ripping apart, tearing, or otherwise not holding its shape after being formed, it probably needs to be kneaded some more. And lastly, if the dough is sticking to the surface of the counter when being kneaded, give it some more flour.
If the dough passes those previous tests, and you are able to handle it without it doing anything weird, you’re probably good. Only you however, will be able to find just how long you want the dough to rise before rolling it out. Some people like to punch the dough back down after its initial rise. So do a couple trial runs and find out what you like best.
The important thing when making pizza dough is using high quality flour. You want to use a high protein flour such as bread flour. If you don’t have bread flour on hand, you can use all purpose flour but substitute some of that flour with semolina flour. We use Bob’s Red Mill and it’s worked great for us. The point is that gluten is the most important detail in breads such as pizza dough.
Let’s get a little technical here so we can find out exactly what gluten is and how it is formed. Gliadin and glutenin (glutenin being the major protein found in wheat flour, it makes up 47
The dough will then become stronger and more flexible while trapping starch as well as the carbon dioxide released by the yeast. The more gluten there is in the dough, the more elasticity it will offer. However, if there’s too much gluten present in the dough, it can actually backfire and turn your pizza dough into something like glue. So keep that in mind.
You can use a mixer with a dough hook or simply use a bread machine when you begin making the dough. Either of them work just fine. Alternately, you could knead the dough by hand if you are looking for a workout. Our bread machine has a setting called dough and it automatically does a double rise, which is pretty convenient. All we have to do is let it do its thing, and when we are ready we can just scoop out half the dough and begin rolling out our pizza.
The recipe that follows is perfect for two 16″ thin crust pizzas. It’s guess work though at that point on what half the dough is, but it usually works out fine. Keep in mind if you use all the dough for a thick crust or deep dish pizza, you will need to bake it at a lower temperature than the 500°F (260°C) we recommend, to ensure the dough gets thoroughly cooked all the way through.
When the dough is ready, sprinkle a fair amount of flour on the surface you intend to work on. Be prepared for the dough to stick to your hands when you transfer it from the bowl to the table. Using some extra flour on your hands or coating them with a light amount of olive oil helps during this process. One other thing I have found that works quite well is to lightly spray some non-stick cooking spray to the hand that you will be using to remove the dough.
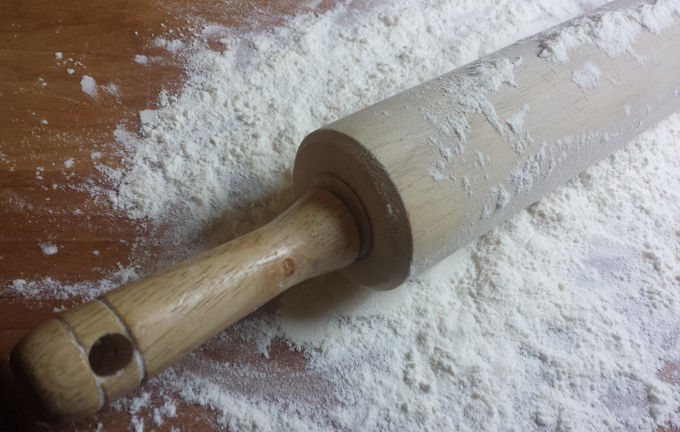
Once the pizza dough is on the table, roll it in the flour so it isn’t trying to stick to everything. Grab your trusty rolling pin if you plan on using it, and begin rolling the dough out. You can do this part by hand if you want, but we have had better luck using a rolling pin, especially for larger pizzas like this. Twirling it in the air of course is also another option, but I’m betting most of us aren’t very proficient at this technique.
The aim is to get it roughly in the shape of a circle. If you are happy with the shape of the pizza dough and it is doing a good job of keeping its shape, it’s time to move on to the next step. This one might be a tad bit tricky because if the dough is too thin it will break apart when you begin to transfer it from the work surface to the pizza pan. This is especially true if there was an insufficient amount of flour to begin with.
Make sure you oil the pizza pan prior to putting the rolled out dough on it! This is important, because no one wants a torn up pizza if it doesn’t want to come off of the pan. So after oiling or spraying the pizza pan, lift the dough onto the pan and begin pulling the ends of the dough out to the edges of the pizza pan. Work your way around the edges to form a small crust using the thumb of one hand and the pointer finger of your other if you want a crust. Otherwise, call it good and move on to the fun part; building your awesome pizza.

The dough should look something like this prior to transferring it to the pizza pan.
As I mentioned earlier, we will be showing you two recipes for pizza dough. This (the quick version) and a different, (2 day version) one that might be more to your liking. You can also freeze the dough if you want to have ready made pizza dough during the week but don’t have time to make a fresh batch every time. To do this, simply follow the steps below.
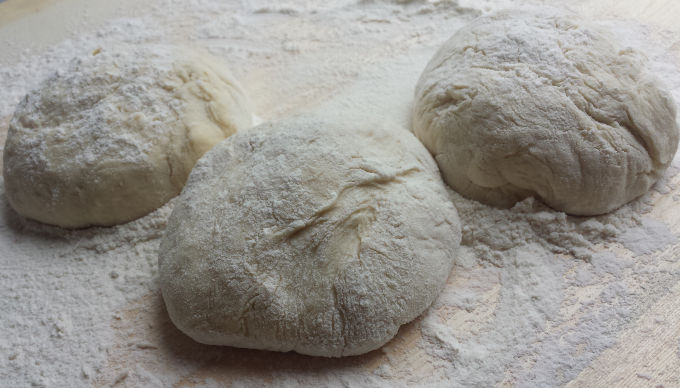
- Begin by forming the dough into individual balls, however large you want your pizza to be.
- Lightly coat each of them with olive oil or non-stick spray.
- Drop each ball into its own sealable freezer bag, squeezing out as much air as you can before sealing shut.
- Place them in the freezer to be stored for 2 – 3 months.
- When you are ready to use them, defrost in the refrigerator overnight.
- Before working with the dough, bring it out of the refrigerator and let it warm up to room temperature or about 45 minutes before rolling it out.
There you have it. I prefer to use bread flour as opposed to all purpose flour (apf) since it has a higher percentage of protein, which of course helps add to the chewiness of the finished product. One more thing to consider however, before I bring this to a close, is that some people add a little olive oil to the dough and there are a couple reasons why you might consider doing that.
Apart from lending flavor to the pizza dough, it can help make the dough easier to form, especially if using a pizza press, by giving it a softer more flexible quality. One that won’t break apart as easy. On top of that, we all know that oil and water don’t mix right?
So by either adding olive oil directly to the dough or even lightly covering the dough before adding the red sauce and the rest of the ingredients, it will prevent the dough from absorbing so much liquid, potentially producing a crispier pizza.
With all that being said, check out the recipe below and as always let us know how your pizzas turned out or how we can improve the recipe. We’re always on the lookout for new ideas.
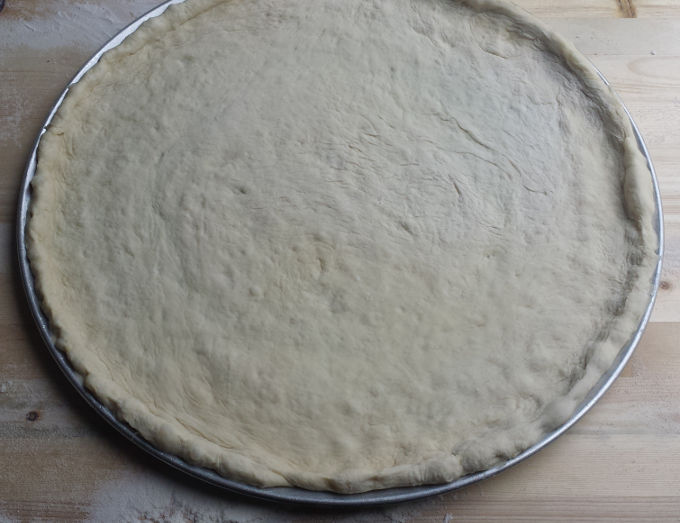
Now that it’s all rolled out, the fun part begins!
Basic Pizza Dough (Same Day Recipe)
By: Semiserious Chefs
Serves: 6-8 (when pizza is complete)
Ingredients:
- 1 1/2 cups water (preferably warm)
- 2 teaspoons sugar
- 2 teaspoons yeast
- 3 1/4 cup bread flour (or substitute 1/2 – 1/4 cup semolina flour if using all purpose flour)
- 1 teaspoon salt
Directions:
- Add water to mixing bowl or bread machine pan making sure the water isn’t too hot to the touch if using warm water. If it’s too hot the yeast might not activate.
- Add the sugar and the yeast to the water. Let it sit for a couple of minutes and then check to see if anything is happening. You will see what looks like little clouds coming up from underneath the water as well as tiny air bubbles forming letting you know the yeast is doing what it’s supposed to be doing.
- Measure out the bread flour (and semolina if you’re going to be using it) and add it to the yeast, sugar, and water.
- Add the salt on top of the flour. It isn’t vitally important if the salt goes in early in this case though, but salt in large quantities can interfere with what the yeast is doing by inducing osmotic stress to the yeast cells. Eventually killing the yeast.
- If you are using a bread machine, find the proper setting and push start. It should do everything by itself.
- If you are using a mixer, set it to medium and let it do its thing. It shouldn’t take longer than 10 minutes. You just want a well defined ball of dough that has cleanly pulled away from the edge of the bowl. Once that has happened, remove the dough and knead it for another couple of minutes if you see fit, and then put it in a large bowl and cover with a damp towel.
- Let pizza rise until doubled in size. About 2 hours.
- Now you can either punch it down and let it rise again, put it in the refrigerator overnight, (many people claim doing this makes for a better, more flavorful pizza dough) or use it as is.
- This recipe makes enough for two 16″ thin crust pizzas, so you will need to use your best judgement when splitting the dough in half.
- Dust your work space with flour and roll out half of the dough with your rolling pin. It helps to put flour on the rolling pin to avoid a sticky mess.
- Transfer the pizza dough to your pizza pan and add your red sauce, cheese, or whatever toppings you are going to use.
- Preheat the oven to 500°F (260°C) and bake for 10 – 12 minutes or until the cheese has turned a nice golden brown.
- Remove from oven and let stand for at least 10 minutes before sliding the pizza from the pan to a large cutting board. You might need to use a large spatula to slide between the pizza and the pizza pan to help it slide off.
- If you would rather use a pizza stone, you will need a pizza peel and be sure to sprinkle some cornmeal on the peel to help the pizza slide onto the stone when putting it in the oven.
Post a comment